Basketball — ZX Vision Link
Start ZX Vision Link and configure Sync, Full Desync, and Normalization.
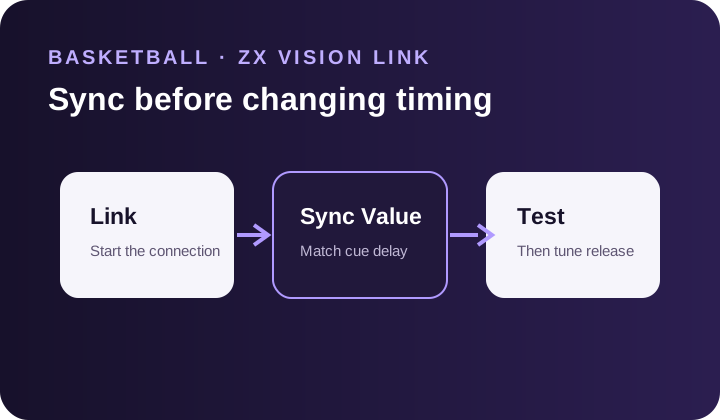
ZX Vision Link works with every Basketball shooting mode: Meter, No Meter, and 3 Icon. This page covers its connection, Sync modes, and Normalization.
Use Sync Value to adjust cue delay, including the delayed-meter appearance when using Meter. Normalization is a separate, optional control that may help when timing feels uneven.
ZX Vision Link is available from Basketball when your account has active access. Its use may be restricted by your game or platform's rules; check those rules before using it.
Start ZX Vision Link
- 1. Open Basketball in ZX Vision.
- 2. Click Start ZX Vision Link and approve the Windows administrator prompt.
- 3. Open Settings, then ZX Vision Link. Set Gameplay device to where the game runs:
- Console for a console game, including Remote Play shown on your PC.
- This PC for a game running on this PC.
- 4. For a console setup, follow Network Setup to check the wired connection and Windows Internet Sharing.
- 5. If the Link panel shows Start, click it. If it shows Stop, leave Link running. Using Full Desync? Enable it before getting onto a court.
Check: Link is running. If the Court row stays on Waiting for court... while you are on a court, use Waiting help before changing values.
Link has its own Start / Stop control, separate from the script.
Choose a Sync Mode
The Sync menu has three choices. Select only one at a time.
- Off — keeps Sync adjustments off. Choose Sync Value if you want a delayed meter or are setting up 3 Icon.
- Sync Value — controls cue delay in any shooting mode, creates the delayed-meter appearance with Meter, and provides the cue adjustment for 3 Icon. It is optional for Meter and No Meter; leave it off if you do not want Sync adjustments.
- Full Desync — favors timing on your own game client, console or PC, over server timing. Skip it when the current setup feels consistent. The 3 Icon procedure requires Sync Value instead.
Sync Value
Sync Value controls cue delay in any shooting mode, not just 3 Icon.
Before shooting with Sync Value, wait for ZX Vision Link's court icon to turn green. Orange means Sync Value is still adjusting. Check it again after changing the value. This applies to every shooting mode.
With Meter, choose ZX Vision Link, Sync, Sync Value and adjust the value. Change one setting at a time and compare several similar shots.
Standstill Release Delay and Fade Release Delay adjust 3 Icon's shot release timing. They do not create the delayed-meter appearance; use Sync Value for that.
If ZX Vision cannot see the meter or shots fully bounce back, use shot and meter troubleshooting first.
For 3 Icon, Sync Value is required. Follow the 3 Icon setup and tuning procedure. The 2.6 starting value and tune-until-early steps are for 3 Icon only, not Meter. Full Desync and Sync Value cannot be enabled together.
Full Desync
Enable Full Desync before getting onto a court. Select Sync, Full Desync before joining the game you want to use it in.
If you enable it during a game, ZX Vision warns that it will not take effect until that game ends and you join the next one. If you leave Full Desync during a game, turning it back on will not restore it for that same game.
Test it over several similar shots before deciding whether to keep using it. It is an optional timing choice, not a guarantee of better results.
For 3 Icon detection and shot timing, continue to Basketball — Settings. The 3 Icon-only Sync and release-delay steps are not instructions for creating a delayed meter.
Normalization Modes
Normalization can help steady an uneven connection and reduce jitter, small variations in delay, so timing feels smoother. Try it after capture and output and Basketball detection are working.
Normalization is separate from Sync. Choose one:
- Off — leave it off when timing already feels consistent.
- Adaptive — try it when similar shots keep alternating between early and late. Use the Adjustment steps below.
- Legacy — a separate option with a Buffer control. Use it when keeping a setup you have already tuned with Buffer.
Compare several similar shots with your other settings unchanged. If a mode feels worse or offers no improvement, return to Off. Normalization is optional and does not guarantee consistent shots.
Adaptive Normalization
- 1. Choose ZX Vision Link, Normalization, Adaptive.
- 2. Start Adjustment at 0.
- 3. Change it by 1, then test several shots.
- 4. Keep the setting that feels most consistent.
The readout does not need to reach 0. Follow how the shots feel, and keep your other timing values unchanged while comparing.
Legacy's Buffer control is separate from Adaptive's Adjustment; do not copy a Buffer value into Adjustment.